December 2, 2016

Irish Dancer Cookies and Surprise Cake

Little Miss Giggleberry turned 9 (yes NINE!!) on Tuesday. Birthdays are always fun and we make a big deal out of them in the Giggleberry household. There is always lots of anticipation and excitement leading up to the day. This year Little Miss Giggleberry didn't have a party so there was no real 'theme' to her birthday. I had her permission to choose what style cake and goodies I would make to share with her schoolmates.
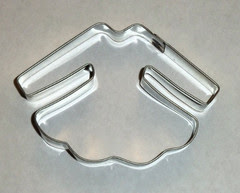
I little ponder a few weeks back and I realised her birthday actually fell on a dance practice day as well as a few of her gifts were Irish dance themed so an Irish Dance theme was picked and I straight away ordered a cookie cutter from Irish Dance Diva that is the shape of a solo dress ready for a baking marathon.


I started with the cookies (mainly because these can be made way ahead of time and frozen). I made 67 cookies!!! As half were to go to school and half were to be shared with Little Miss Giggleberry's dance buddies.
Once the cookies were cut, baked and cooled. I packaged them up and froze them for 24 hrs. It makes decorating them allot easier as they aren't so delicate. Working with 5-10 at a time I rolled out fondant, in the three colours requested by the birthday girl, and attached it to the cookies with a little sugar water. I then had lots of fun imprinting patterns and cachous onto the little dresses for some fun detail. This was my first time playing with fondant on cookies but I was pleased with the result and will absolutely be using it again.


Little Miss Giggleberry was thrilled to take these to school and dancing class to share with all her special friends.

Then onto the cake! I kept this a surprise, for a few reasons. 1) Surprises are fun. 2) The inside of the cake being a surprise would be ruined if she knew before hand and 3) If I completely stuffed it up she would never know any different!
With a basic butter cake mixture all prepared and divided into three. I used the three colours the birthday girl had chosen for her cookies and coloured it. Then one heaped spoonful at a time I scooped it into the prepared loaf tin and baked it as per usual.


Once it was baked and 100% cooled I sliced it up like a loaf of bread then froze the pieces in a sealed container overnight.


The next day I prepared another butter cake mix then set it aside for a moment while I prepare the already sliced cake. While the slices are still frozen cut out the shape (you can honestly use whatever cookie cutter shape you want - think Christmas tree for the festive season, pumpkin for Halloween, blue or pink star or heart for baby gender reveal. the possibilities are endless) from each slice and discard the off cuts. The below photo is of the 'dress slices' all stacked up on each other.


Alrighty, now grab the greased and floured cake tin and scoop in about 1/3 of the butter cake mixture and smooth out. Then one by one place the cut out shapes into the mixture so they are standing up in a row touching one another.


Gently cover the shapes with the rest of the butter cake mixture and tap the tin lightly to try to remove any air bubbles. Bake the cake as usual in the oven.
Now the trickiest thing about this cake, especially when this was the first one I had attempted, is that you kinda have no idea if it has worked until the cake is sliced! So I crossed my fingers and just kept on.
Once completely cooled I iced the cake with some white icing and a heavy sprinkling of cachous. Added some candles and crossed my fingers it had worked.

After our family dinner we sang Happy Birthday, Little Miss Giggleberry blew out the candles and I handed her the knife to slice away.....
IT WORKED!!!


I was so glad and the GASP that came from the birthday girl herself when she saw the dress inside the cake was worth all the extra fuss!!

Giggles

November 4, 2016

Super Heros of every kind...

Super Heros. We all know them and we all have our favs.... Who's your pick?
Captain America?
Batman?
Buzz Lightyear?
Spiderman?
One of the many heroes from Star Wars?? (My fav has to be BB-8 for sure)
Or to be safe how about a combo of them?

Custom orders available to suit your favourite! giggleberrycreations(at)gmail(dot)com
Giggles

October 28, 2016

Crazy Hair Day - Birdy Cage & Lizard!

I am one of "those mums" who LOVES a good dress up or fun sock or book week or themed in some way day at the kids school. I really enjoy putting together a look or design idea with the kids then getting to complete it! It really gets my creative blood pumping!
So when the kids brought home a note a few weeks ago telling parents about the upcoming Crazy Hair Day I was thrilled! The kids school hasn't had one of these in three years and the last time was just Little Miss Giggleberry's hair I got to do (remember her Mrs Potato Head hair?)

We got Pinterest hunting. Now that the kids are a little older they seem to make allot more of the decisions rather than when I use to get away with suggesting one or two simple ones and the picked from those. Choices were made, a few crafty bits were purchased and we were set!
Little Miss Giggleberry ended up with a Birdcage, complete with a bird on a swing, on her head!

I 'built' the cage from an old wire coat hanger (that I then wrapped in craft tubing so it would be soft on her head) and pipe cleaners. Then it was pretty simple to just place on her head and twist sections of hair up and around it. Then a few twists of the pipe cleaners at the top head them all together for the whole day!
The bird was a christmas decoration I found at Spotlight FYI.

Master Giggleberry also went with an animal.... a Googly Eyed Lizard (although looking back at the photos it totally looks like a frog LOL)

He was fun to make. With the hair all gelled down I used my blow dryer to set it hard. A quick (and rough) outline of the legs and body was easy to draw on with an eyeliner pencil. Then I pulled out good old poster paint and got painting - yep, poster paint! I did use the blow dryer again to dry the paint so he didn't end up in a complete mess.
The eyes were just two large google eyes stuck on a hair clip - easy!

The kids loved the creations and had lots of their friends and teachers amazed as they walked to their classrooms for the day.
Giggles

October 27, 2016

Ghostbusters Proton Pack DIY

Yes, yes, yes. It has been over 2 years since my last post. I can bore you with all the "I've been really busy" excuses or I can just get on an get blogging again.
Its Halloween in 4 days! Yay!
The Jnr Giggleberrys decided just last Saturday that they would like to dress as the Ghostbusters for Trick or Treating. They asked two of their cousins to join us to make the awesome foursome complete and got a big fat YES in reply. So decision was made now over to me apparently to make that all come together!!
I work Monday, Tuesday, Wednesday so haven't had a chance to do much more about the costumes besides a bit of Pinterest hunting until today. Today was the day I got stuck into it.... Starting with the Proton Packs!! You know, those backpack things the ghostbusters all carry to blast/suck up/kill/collect ghosts with?
To make four of them on the cheap took a bit of out of the square thinking but I got there.
I started with 4 empty cardboard boxes. These were all different shapes and sizes but I figure so are the kids so go with it! I then poked black elastic though one side of the box to create backpack 'straps' for the kids arms and taped the boxes shut.

Next up - raid your recycling bin!! Go nuts! Look for smaller containers, yoghurt tubs, bottle lids etc etc. I then rifled through the 'everything draw' in our kitchen. You know the one that has everything in it and is a complete mess?(or is that just my household) in that bottomless pit draw I found bolts, plastic thinga-ma-jiggys and an old spiral bound note book that I stole the spiral from!

Now arrange the bits and pieces on your box until you are happy with the layout then hot glue it all down. I had to make four so tried to make them as similar to each other as possible with the bits and bobs I had gathered.
This is when I decided to add the tube thing on the side that will join to the 'gun' the ghostbusters hold. This was just light plastic tubing I bought from a hardware store. I guess ducting would work too.
I cut a small hole in the side of each box and poked the tubing in. I didn't bother glueing it but you could if you wanted to.

Spray paint them black. I picked Matte Black paint for this.

Then with your hot glue gun again, stick on a few coloured 'wires' I used some craft piping stuff I had lying around. I also stuck on some round red sparkle stickers to look a little like lights.....

I bought 4 super cheap guns from the $2 shop. All black ones. The shop had three of one style so I had to get a forth that is little different. No biggie. Out came the trusty hot glue gun again and I half glued, half jammed the end of the gun into the other end of the tubing until it would not budge. No real trick to this just go nuts.....
Ta Dah!! Four homemade Proton Packs - DONE!

Now I have 3 days to get four outfits made on the cheap..... but thats another blog post!
Giggles